Sunday, October 20, 2013

Antique Anatomy End Table


Hello!

During the week saw a DIY post by Mr. Kate. This weekend I decided to make my own table inspired by her original idea.

Below is my version!

What you need for this:

Table, sandpaper, masking tape, mod podge or Aleen's craft glue, paint (I used water based rustoleum in gloss black), polyurethane, burnt sienna acrylic paint (optional), paint brushes (foam are good), and a utility knife

My mom and sister found this little end table at a yard sale for a few dollars. I liked the shape and figured it could just use a little make over.


First of all, I found photos I liked online of old anatomy illustrations and printed them for the top and tore all of the edges.


I actually had to putty some grooves in my table so I would have a flat surface for my photos. Then I sanded the top as well as the entire table since I planned to paint it.


Painting time! I taped off the area where I wanted to place the images.


Once the paint is dry, tape off your painted area. Next put together a basic layout of the photos on the table. I just filled the gaps in with other bits of paper. 


 You are ready to decoupage!


After I was done with laying everything down, I decided I wanted to add some additional "age"and highlight some of the texture by brushing some color in. I used burnt sienna paint diluted into a glaze in some areas and lightly stippled in full strength in other areas. This is totally optional.


Once this is completely dry, seal with polyurethane (water based version). I applied 2 coats.


After fully dry, use the utility knife to trim your edges. Take the tape off and you are finished. Now you have a unique piece for your house!


Thanks for reading!

Thursday, September 26, 2013

My Summer Garden

I wanted to post some photos on my summer garden as well as some of the harvests and a couple dishes I made. It has been so rewarding to plant, care for, and watch everything grow. Above all, to get to eat fresh veggies is absolutely amazing!


Humble beginnings!


Getting bigger


The harvest starts!


Kitty likes to help out too!


Veggies and herbs to pair with pasta


I see taco salad in my future!


 Mint to garnish homemade banana ice cream!


Tomatoes and herbs! Good to use in a raw lunch!


Homemade green juice with fresh dill, tomato, and guacamole on zucchini! Delish!


Yay! Lots of fresh lemonade and juice!


If you have a little land or even a sunny spot where you can grow in pots a garden is worth so much! I highly recommend starting your own food or just some flowers it is so much fun :)


Thanks for reading!


Saturday, June 23, 2012

These Boots Were Made for Walkin'

Hello All,

Here is an easy way to make any old pair of shoes or boots you have on hand into a unique statement that is all your own!

I loved these boots but wanted them to go with my style a bit more. I was looking online a saw some shoes with an amazing print and I thought, "Hey I can easily do something similar with nothing but a couple of sharpie pens!"


Below is the process in photos:

As you can see above, I used two sizes of sharpie pens (have two pens of each size on hand in case one runs out of ink) and one color, black (is there any other color? Hehe). You can use what ever colors or motifs fit your personal style. My only suggestion is that you use permanent marking pens. If you are afraid of making mistakes, you can draw out your motif lightly with a washable marker before putting down the permanent ink. 


 This entire project took about 2 1/2 to 3 hours to complete. 
Here are my new boots!


Thanks for reading!

Thursday, April 26, 2012

Table Make Over

Hello All!

I wanted to share a way to re purpose old furniture. This is not really a step by step but simply photos of  my process to inspire you to reuse your items :) 

Here are the photos with brief descriptions.


First I painted the entire table with black gloss rustoleum paint and let it dry completely.
I had a basic design (colorful and some art nouveau influences) in mind but nothing specific. I used inexpensive acrylic paint and just went for it.


Once I got the design in place and it was completely dry I sealed the table with a water based polyurethane. I used 3 coats which I let dry in between each coat.


 Before you consider getting rid of something or spending a fortune on something new and not as well made, think about re purposing something in your home.


 Thanks for reading!


Friday, March 23, 2012

Etsy Store Update!

Hello everyone!

I have 3 new listings for some items I made last week. I just posted them to my etsy store:
Enchanted Revolution

Here are some photos below :)


DAPPER DEATH


Dapper Death is a one of a kind wooden clothespin doll with a hand sculpted and painted face. He is wearing a black felt cape, brown felt ascot and Black felt stovepipe hat. He is ready to steal the life of the party. 

Dapper Death is about 4 inches tall. 


Click below link to go to listing: 

Dapper Death


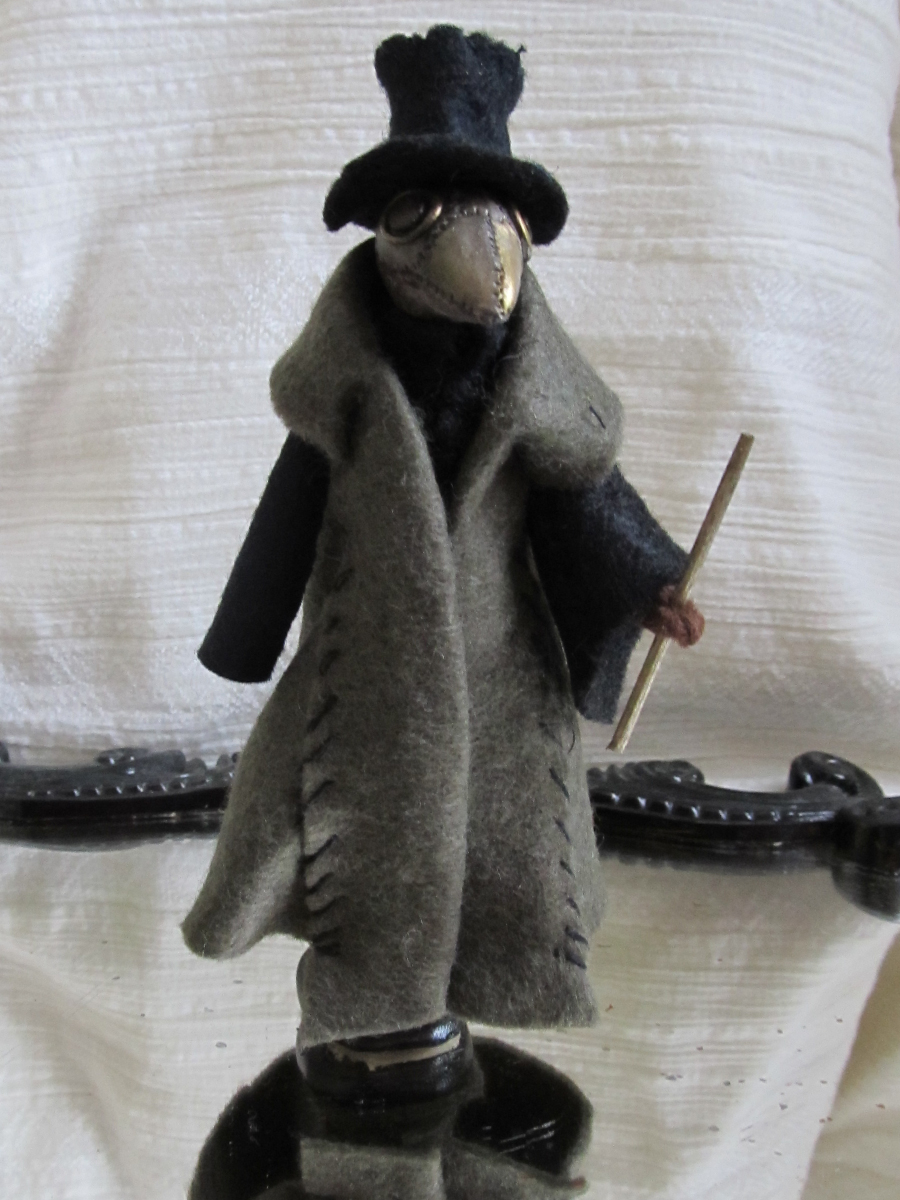
THE PLAGUE DOCTOR

The Plague Doctor is a one of a kind wooden clothespin doll with a hand sculpted and painted face. He wears a two tone felt duster with top stitching and a black felt top hat. He carries his examining stick and is ready to ward off hoards of plague victims while wandering though villages.

He is about 4 inches tall.


Click below link to go to listing: 


Plague Doctor


KITTY CATS


These kitty cats are one of a kind hand sculpted and painted figurines and are about 1 inch tall. They are looking for a new home where they can watch over things for you.


Click below link to go to listing:


Kitty Cats 


Hope you enjoyed checking these out. Thanks for reading!